Balloon models are a great, fun way to bring life to any party. Whether you have them dotted about the room or you let your guests make a special request to see their colourful balloon creations come to life, they will love the addition of carefully modelled balloon animals and objects at your party.
Modelling balloons might sound complicated, something better left to the professionals, but that’s simply not the case. With some simple instructions and the right equipment, you can make your very own balloon models for your next event.
The first thing you’ll need is a colourful collection of long balloons, the most common of which is the ‘206’, two inches in diameter and 60 inches long. Long balloons are designed to be used for modelling. You can blow these up yourself with your own lungs, with a hand-held pump or with a helium tank, depending on the purpose of the balloons.
Once you have your balloons, it’s time to get modelling. Here are 3 simple balloon models that you can make yourself:
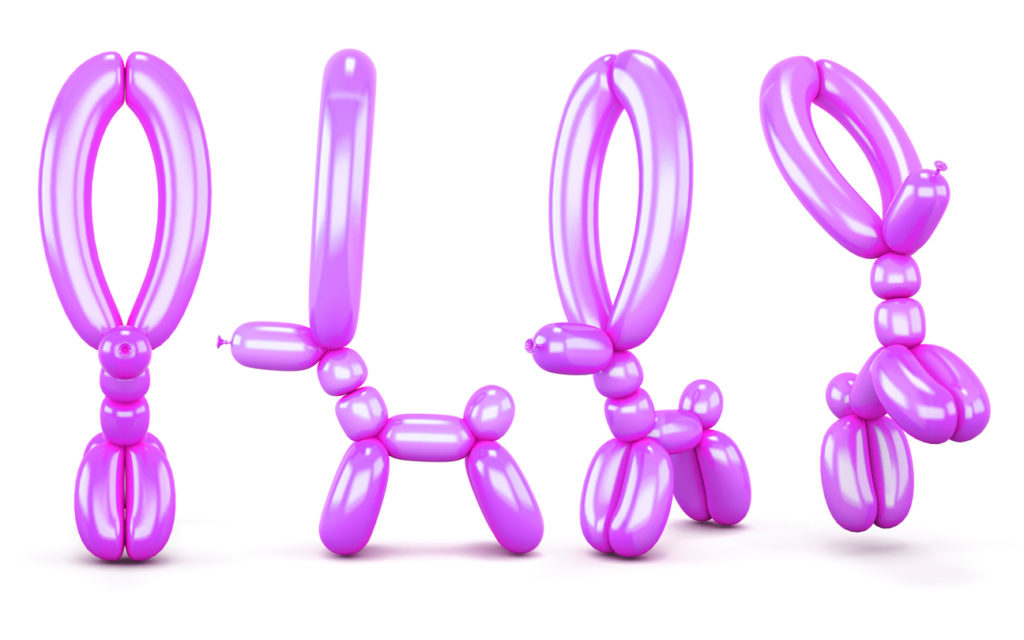
The Dog
Probably the most recognisable and well-known of all balloon model creations, the dog balloon is incredibly common and surprisingly simple to make.
You will need just one long balloon in any colour.
Step 1: Inflate the balloon to about two inches from the end (this deflated bit will form the tail).
Step 2: Twist three basic balloon twists. A basic twist is when you twist the balloon to create segments. Your first twist will be about two inches long, and the following two need to be smaller, an inch each. These will make up the components of the dog’s face.
Step 3: You will now need to create a lock twist to pull the head together. A lock twist is when you twist balloon segments together and isolate them from the rest of the balloon. Bring the longer twist from the previous step against the main body of the balloon and twist the two smaller segments together into a lock twist.
Step 4: You should now have your dog’s head. Now you need three more basic balloon twists, but longer three-inch ones. One for the neck, and the other two will form the legs. As with the head, you need to fold the two back twists together and twist them into a lock twist. You will now have a dog head and front legs.
Step 5: Twist three more three-inch basic twists. The first is for the body, the second and third will form the back legs, and the leftover segment is for the tail. Do the same again and do a lock twist on the back legs.
You should now have a fully formed dog balloon model that kids will love. If you want some variation, make a longer body to create a sausage dog, or an extra-long neck to create a giraffe.
The Flower
This is the perfect model to create some great wall decorations.
You’ll need two long balloons, a green one for the stem and a colour of your choice for the petals.
Step 1: Inflate the ‘petal’ balloon about an inch from the end.
Step 2: Tie the two ends of the balloon together; the leftover inch can be wrapped around the knotted end of the balloon in a square knot, creating a loop out of the balloon.
Step 3: Bring the knot to the centre of the balloon and twist the knot into it. You should have two loops that resemble a bow tie.
Step 4: Bring the centre of one of the loops towards the knot, twist into the centre to create three loops (two smaller ones and a larger one).
Step 5: Do the same to the larger loop so you have four. You can repeat this process for a fuller flower.
Step 6: Straighten out these loops to form the petals.
Step 7: Take the green ‘stem’ balloon and inflate it whilst leaving half an inch.
Step 8: Make a small basic twist at the nozzle end about an inch in length. Join this twist to the centre of the petals by stretching the basic twist away from the balloon and inset the flower so the petals sit between the nozzle twist and the rest of the balloon.
Steps 9: To hide the nozzle, wrap it around the flower in between the petals.
You will now have lovely flowers to decorate your event with or hand out to guests as an arrival or departure gift.
The Love Heart
A heart-shaped balloon model makes a wonderful gift for your Valentine.
You will need just one inflated (red or pink) long balloon.
Step 1: Inflate the entire balloon, you’ll want it to be firm.
Step 2: Twist the ends together to form a circle, leaving an inch of each end of the balloon extending beyond the join.
Step 3: Reach to the opposite end of the circle and pull the middle of the balloon into your hand, pulling down on the centre of the loop to create the heart shape.
Step 4: Hold in this position. The balloon should form a permanent bend – the longer you hold for, the greater the bend.
These simple hearts will make a great gift for a loved one, or for any Valentine-themed event. Once you have mastered these three simple balloon models, you’ll soon be able to turn your hand to any number of more complex creations.
Balloon models make great additions to parties for kids to play with, or as part of the décor. You can get a helium balloon kit or a helium tank to really bring your creations to life. Tie some string to your creations to add more fun and whimsy, as they float merrily around your guests, or bunch them together for a fantastic balloon model bouquet.